Lion’s Mane Mushrooms are a delicious and healthy treat that you can quickly grow yourself. Growing lion’s mane mushrooms is so effortless that one can even leave them on their own!
Below, we’ll share information you need to get started with growing your own lion’s mane mushroom.
What Is Lion’s Mane Mushroom?
The Plant
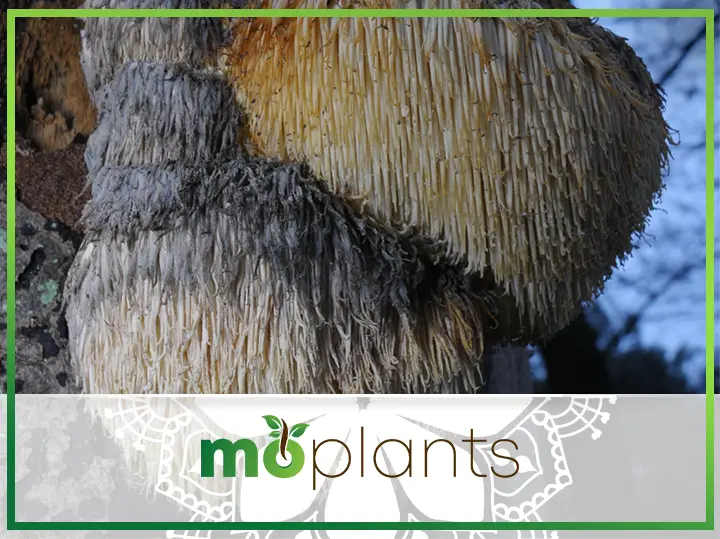
Lion’s mane (Hericium Erinaceus) look like large white snowballs, with some browning when the spines are damaged or old. Each mushroom can be pretty significant, sometimes even weighing over 1 pound.
The spines or “teeth” start small, but become longer the older they are. The mushroom itself is spongy and sometimes partially hollow.
In the wild, it looks like coral or icicles latched onto a tree.
When grown at home, lions mane mushrooms often come out of colonize bags as small blobs at first. As days go by, the lumps will continue to grow, and teeth or spines will emerge, creating spiky looking mushrooms.
The bag placement will determine how one’s lions mane mushroom will grow, as it will depend on gravity. If you want to recreate the look of wild lion’s mane mushrooms you can let H. Erinaceus grow at home from a side angle.
The Taste
Inside is a delectable treat with a sweet, meaty flavor reminiscent of crab. It is an extremely versatile ingredient.
If you are a vegetarian, lions mane mushrooms are an excellent substitute for meat and can often replace chicken, crab, or lobster due to their spongy and meaty texture.
Cooking
You can just cut a lions mane mushroom lengthwise into long slices then fry it in a pan.
Then, you can dip it in melted butter. They are also excellent at soaking up the flavors it is cooked in.
They are great as the main ingredient or as a delicious side dish.
Health Benefits of Lions Mane
Lion’s mane mushrooms have medicinal properties, too. They can help increase cognitive abilities by initiating the growth and regeneration of your nerves and can improve mild cognitive impairment.
This is why lions mane can also be found in health stores and as an ingredient in supplements. Its ability to help cognitive improvement has even been studied and proven! [R]
Furthermore, they are said to help fight anxiety and depression, support healthier immune responses, has anti-inflammatory properties, and support heart health, good circulation, and digestion.
Location
One can choose to grow H. Erinaceus in a small scale inside your home, in the yard, or in your local garden.
Just remember that the lion’s mane mushroom, like any other mushroom type, will require a lot of humidity and ventilation for the mushrooms to grow well.
How-to: Growing Lion’s Mane Mushrooms
If you are familiar with growing mushrooms at home, the process for growing Hericium Erinaceus isn’t far off.
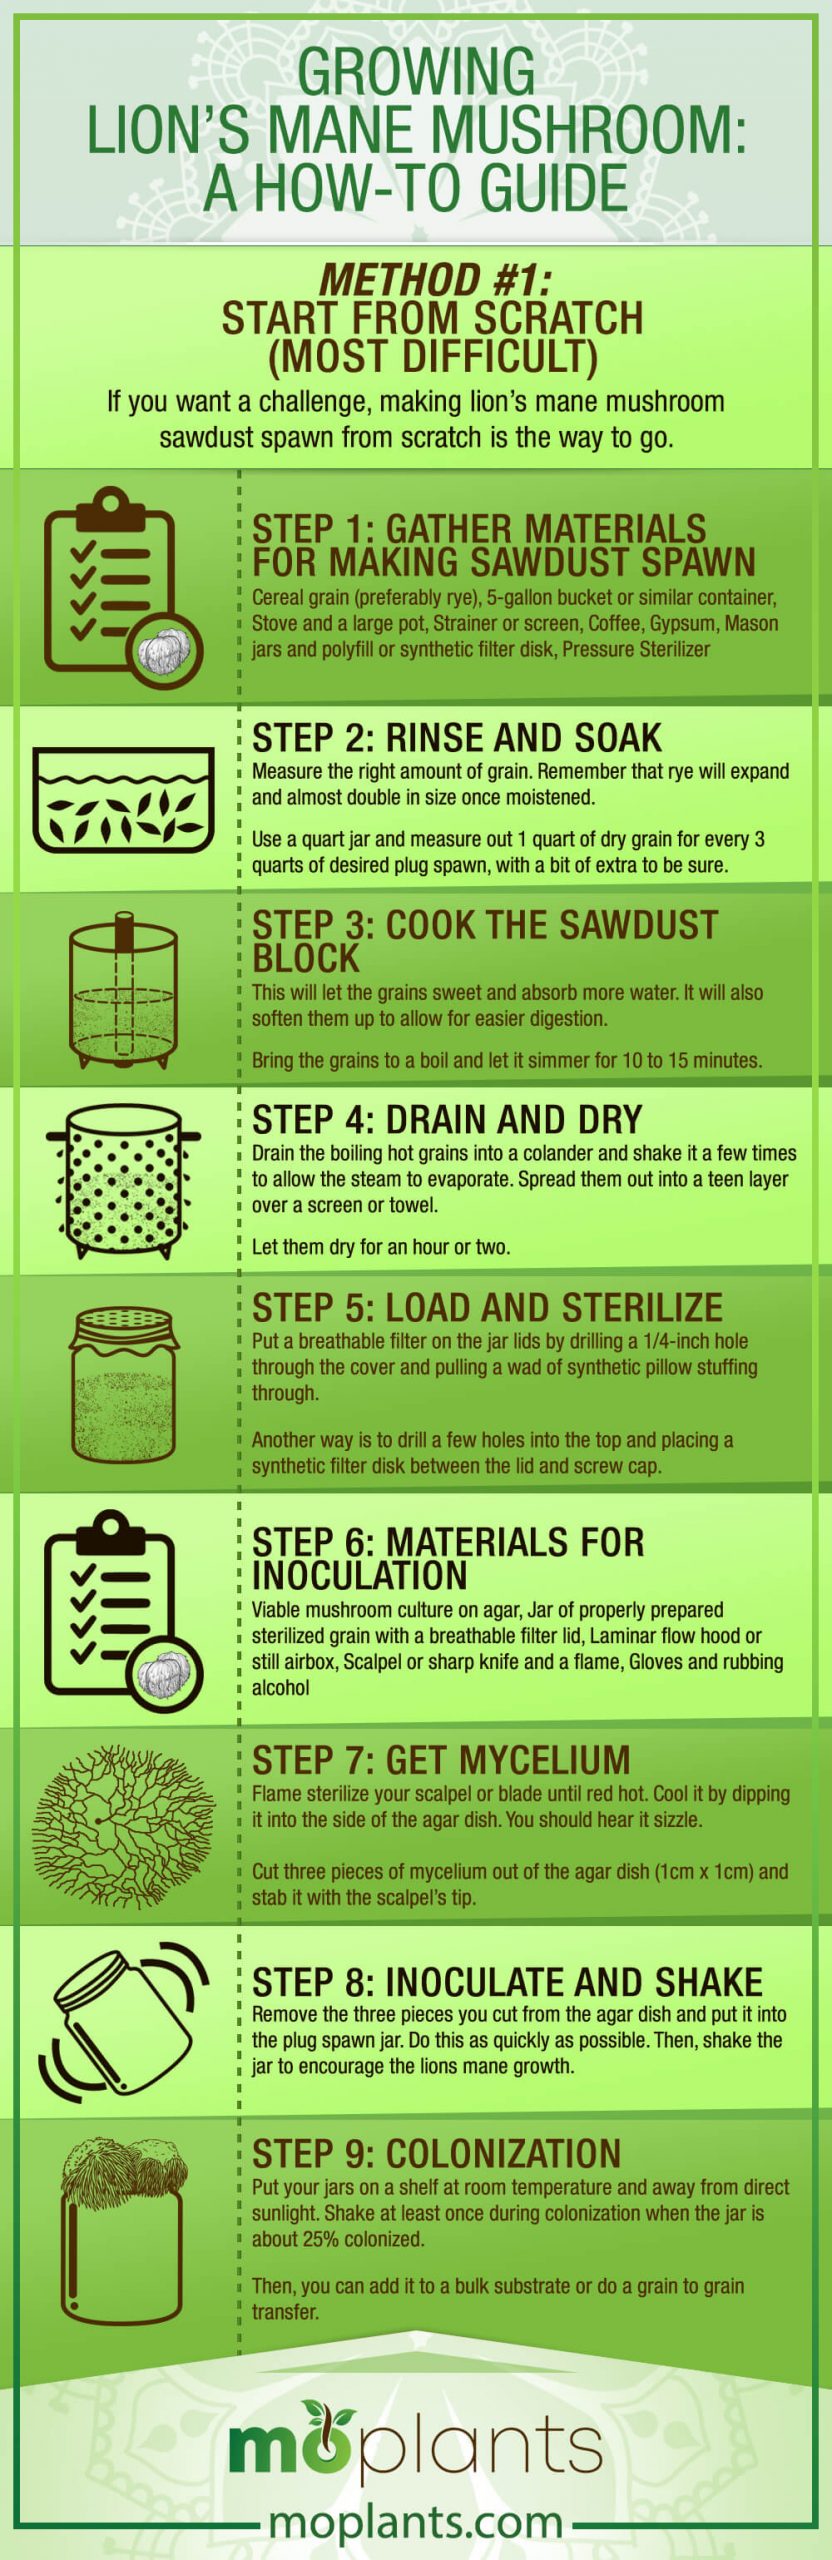
Method 1: Start from Scratch (Most Difficult)
If you want a challenge, making lion’s mane mushroom sawdust spawn from scratch is the way to go.
Step 1: Gather Materials for Making Sawdust Spawn
- Cereal grain (preferably rye)
- 5-gallon bucket or similar container
- Stove and a large pot
- Strainer or screen
- Coffee
- Gypsum
- Mason jars and polyfill or synthetic filter disk
- Pressure Sterilizer
Step 2: Rinse and Soak
Measure the right amount of grain. Remember that rye will expand and almost double in size once moistened.
Use a quart jar and measure out 1 quart of dry grain for every 3 quarts of desired plug spawn, with a bit of extra to be sure.
Mix and rinse the grain 4 or 5 times in cold water until the water coming out is reasonably clear to remove any dust, wood chips, dead bugs, etc.
Place the grains in a bucket or large bowl and fill it with water then throw in a bit of coffee to increase yield by changing the pH level and gypsum to prevent the grains from sticking together.
We suggest using a cup of coffee and a tablespoon of gypsum for ten jars of grain.
Then, let the grains soak for 12 to 24 hours to let it absorb the water and allow the contaminants to sprout so they can be sterilized later on.
Step 3: Cook the Sawdust Block
This will let the grains sweet and absorb more water. It will also soften them up to allow for easier digestion.
Bring the grains to a boil and let it simmer for 10 to 15 minutes.
Do not overcook the grains as this can crack them open, which will increase the chances of contamination from mold or others during incubation.
Step 4: Drain and Dry
Drain the boiling hot grains into a colander and shake it a few times to allow the steam to evaporate. Spread them out into a teen layer over a screen or towel.
Let them dry for an hour or two.
Once ready, there should be no noticeable moisture on the outer layer of each grain.
To be sure, pick up a handful. These should be loose individual kernels that are dry on the outside and swollen with the water they have absorbed.
Step 5: Load and Sterilize
Put a breathable filter on the jar lids by drilling a 1/4-inch hole through the cover and pulling a wad of synthetic pillow stuffing through.
Another way is to drill a few holes into the top and placing a synthetic filter disk between the lid and screw cap.
Pour the grains into a jar until it is about 2/3 to 3/4 full, then close it with the lid. We recommend putting on the lid upside down to make it easier to pry open later on.
Cover the lids with tinfoil to prevent water from spilling into the grain.
Using a pressure cooker or autoclave, sterilize the grains at 15 PSI for at least 90 minutes.
Only start timing the 90 minutes once the pressure inside has reached 15 PSI.
Once the time is up, turn the stove off and walk away. Allow it to cool for a few hours.
When ready, check the jars to ensure a reasonably clean environment inside. Ensure there are minimal broken grains, and they aren’t clumped together.
Step 6: Materials for Inoculation
- Viable mushroom culture on agar
- Jar of properly prepared sterilized grain with a breathable filter lid
- Laminar flow hood or still airbox
- Scalpel or sharp knife and a flame
- Gloves and rubbing alcohol
Step 7: Get Mycelium
Flame sterilize your scalpel or blade until red hot. Cool it by dipping it into the side of the agar dish. You should hear it sizzle.
Cut three pieces of mycelium out of the agar dish (1cm x 1cm) and stab it with the scalpel’s tip.
Step 8: Inoculate and Shake
Remove the three pieces you cut from the agar dish and put it into the plug spawn jar. Do this as quickly as possible. Then, shake the jar to encourage the lions mane growth.
Step 9: Colonization
Put your jars on a shelf at room temperature and away from direct sunlight. Shake at least once during colonization when the jar is about 25% colonized.
Then, you can add it to a bulk substrate or do a grain to grain transfer.
This will last for a long time on a culture plate. They can easily last 2 years or more as long as you store the plates in the fridge.
Infographic
Method 2: Add Grain Spawn to Substrate (Intermediate)
Suppose you have sufficient experience with cultivating your own Hericium Erinaceus but don’t want to start from scratch.
In that case, you can choose to get a lions mane grain spawn and add it to an appropriate substrate to let the lions mane grow.
Step 1: Ready Your Substrate
A mushroom substrate is any substance on which mycelium, the “tree” from which your lion’s mane will come from, will grow.
You can use hardwood sawdust that has had some wheat bran or oat bran added to it to create fruiting blocks as your substrate.
If you do not know how to make your substrate, the general recipe for a fruiting block will work. Some fruiting blocks have a ratio of 50% hardwood sawdust and 50% soy hulls that have been hydrated to 60%.
Step 2: Add Spawn
Add your lion’s mane spawn at a 10 to 15% spawn rate to your sterilized substrate. Make sure to do this in a clean environment.
Shake the sawdust block to distribute the spawn evenly, then tie off the top of the bag, and store it on a shelf.
Step 3: Colonization
Allow your spawn to colonize, which usually takes about two weeks.
Generally, lion’s mane mycelium looks wispy and thin in places, so do not worry if your lions mane does not look like another type of mushroom, like colonized oyster mushrooms or shiitake mushrooms.
Check your lions mane once in a while for contamination. If it’s contaminated, throw out the bag and start again.
Once fully colonized, your bags are ready to fruit.
Step 4: Fruiting Bodies
From here, one can follow the same steps as you would with a grow kit.
Lion’s mane mushrooms fruit quickly in about 2/5 days, so it is highly likely that you will start to see small fruits forming in the bag even before you expose it to fruiting conditions.
If this happens, bring the block to the fruiting area and cut small X’s where the fruits are already forming.
This allows the pins to continue developing, eventually giving you large mushrooms outside the bag.
Method 3: Lion’s Mane Cultivation on Hardwood Logs (Intermediate)
Lion’s mane does not grow quickly on logs. They usually make a small first flush six months after log inoculation, but it may take up to 2 years for them to do well.
Your legs will continue bearing fruit for up to 6 years.
Step 1: Prepare Logs
Lion’s mane mushrooms only grow on hardwoods.
The best are oak, maple, and birch, however, one can also grow lion’s mane on black walnut. For short-term, small-scale production of gourmet mushrooms, you can also use tulip, poplar, or willow hardwood logs.
Make sure the wood isn’t too green and has not been invaded by other fungi.
The logs should be 12 inches in diameter with uniform length. 3-foot logs are the easiest to manage.
Dry the logs on a pallet or raised surface for 1 to 3 months so they only have 40% moisture content. Once dried out, you can inoculate them. Spring is the best time to do this.
Step 2: Inoculate Logs
- Drill each log with rows of holes. You can use chalk to draw a line and make sure the rows are straight.
- Melt your wax in a double boiler. Ensure the temperature stays below 212°F.
- Drill holes 1 and 1/4 inches deep and 8 inches apart in rows that are 4 inches apart. Alternate the starting point of the holes from the top of the lion’s mane mushroom’s log.
- Start placing lion’s mane plugs or spores. Complete one log at a time to avoid contamination.
- Use a mallet or hammer to gently push the spawn plugs into the hole until it is flush with the wood surface.
- Use a paintbrush or baster to place wax over the plug and hole.
- Soak the logs for 12 to 24 hours maximum.
Step 3: Caring for Your Logs
Stack the logs in a moist, airy, and shady location crib-style. You can also lean them against beech totems or a wood pole at a 45° angle.
To troubleshoot problems maintaining moisture, try partially burying the logs vertically.
Method 4: Grow Kit (Easiest)
A mushroom grow kit is the easiest way to get started if it is your first time with mushroom cultivation.
A kit has a fully colonized mushroom fruiting block that will quickly get you started on growing your lion’s mane mushrooms.
If you don’t know where to find a grow kit, we recommend one of the many kits with great reviews from Amazon.
These kits usually give you a block of soil and mycelium – a thread-like collection of cells that is the vegetative growth of fungi.
Step 1: Open the Grow Kit
Make sure to put the block from your kits in a relatively humid environment.
Cut the block out of the plastic in which they came. Then, cut some X’s into the side of the bag and put the block on its side on a plate so that the lion’s mane mushrooms can grow on top.
If you need to increase humidity, place a sheet of perforated plastic over the lion’s mane while making sure there are lots of free space between the block and plastic.
The fruits of the lion’s mane will naturally start to form through the holes in this bag.
Step 2: Moisture and Air
Once the block makes contact with the oxygen outside of the plastic bag, all you need is to provide moisture.
Mist inside the plastic bag using a spray bottle a few times a day and ensure you fan in a lot of fresh air.
If you want a better growing environment for your mane, you can build a shotgun fruiting chamber.
Moisten the lion’s mane block every day and cut holes as you go.
This will initiate the growing process and allow them to repeatedly produce mushrooms, depending on the concentration and proportions in the grow bag you purchased.
Step 3: Observe
Fungi, unlike plants and vegetables, take in oxygen and give out carbon dioxide. So observe the structure of your lion’s mane mushrooms to see if they are growing well.
If the lion’s mane mushrooms look stringy, something is missing. You need to pay more attention to grow lion’s mane mushrooms properly.
Otherwise, repeat step 2 until you are satisfied with your lion’s mane mushrooms.
Conclusion
It’s beneficial to grow lion’s mane mushroom spores for your dinner plate or numerous mushroom products. Various health supplement products show the benefits you can get.
Whether you choose to grow lion’s mane mushrooms from a kit or from scratch at home, this is one mushroom worth the work.
We hope the information we gave you helped!