So you want to be the next Martha Stewart of gardening? Small steps, flower child. And big dreams, we are here to help!
Raised bed vegetable gardening is a century-old method and one you can rely on for an abundant harvest. Other benefits include improved drainage, more space, and better control over your gardening dreams.
Enough benefits, though. We’re here to help transform your garden with raised beds. To do that, follow the steps below, and before you know it, you’ll be reaping vegetables with a ton of benefits.
Essential Gardening Tools & Equipment You Need for Raised Bed Gardening
Here’s what you’ll need before we get started:
- Watering can
- Potting soil
- Small trowel
- Shovel
- Containers
- Digging fork
- Hoe
- Rototiller (only if you have a larger garden)
How to Start a Raised Vegetable Garden for Beginners?
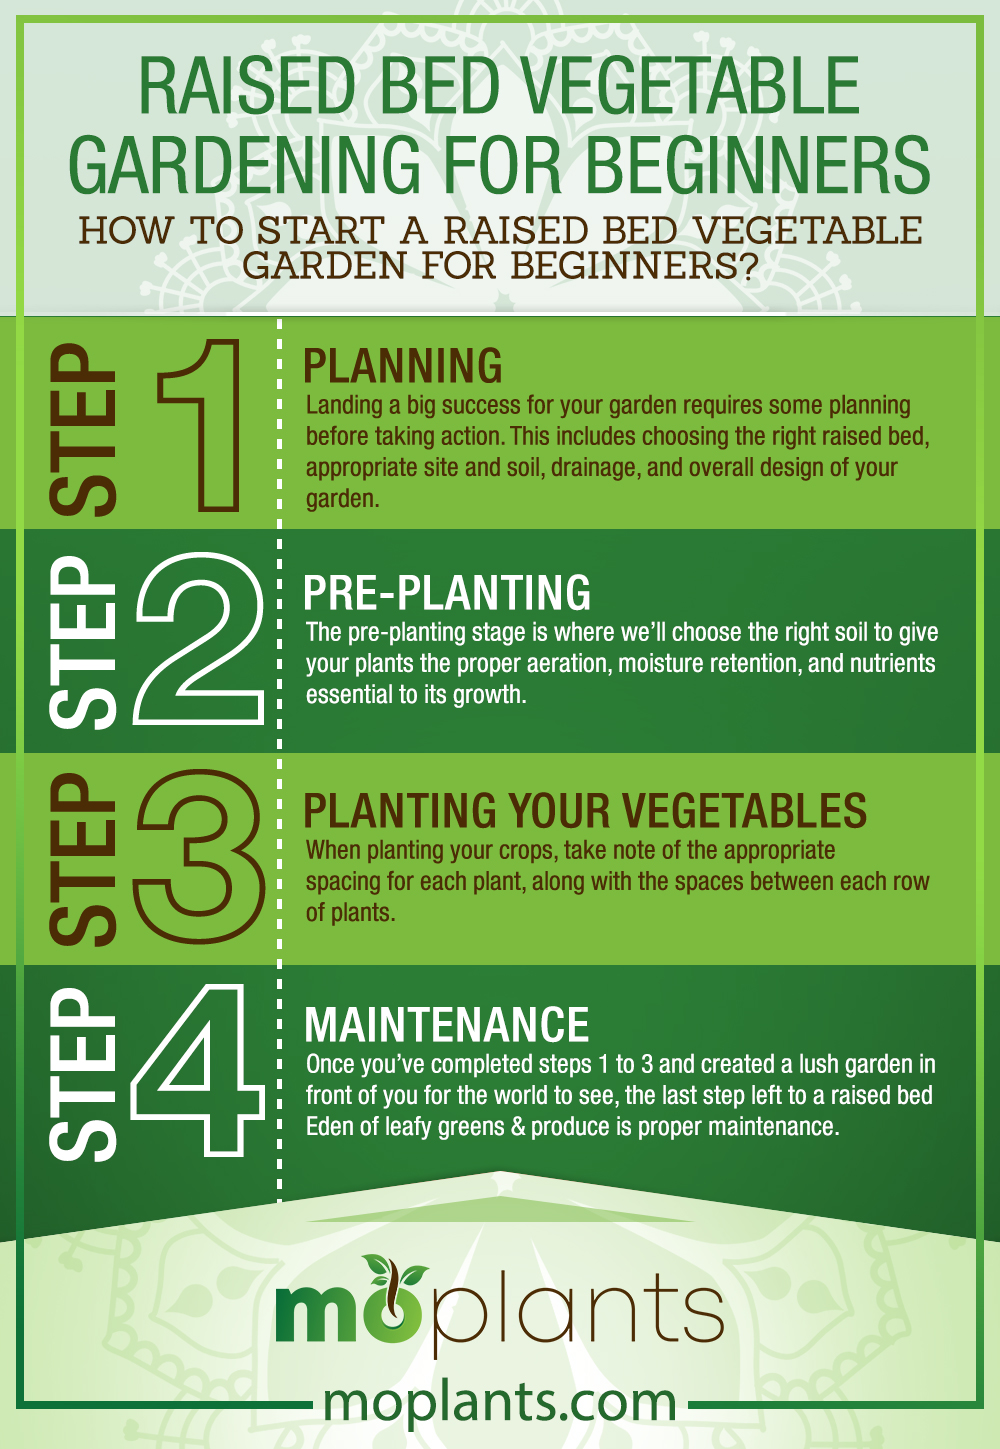
Step 1: Planning
Landing a big success for your garden requires some planning before taking action. This includes choosing the right raised bed, appropriate site and soil, drainage, and overall design of your garden.
Choosing Your Site
A vegetable garden is as good as its location. Every gardener considers location as the most vital planning step in gardening.
Why you may ask? Here’s a not-so-secret tip: good soil.
Good soil is crucial to your harvest, and it’s a tried and true testament for every gardener. Your garden beds depend on good soil. Without it, you’re wasting time, money, and all the times you’ve had to arch your back, hoping it wouldn’t crack.
There is one advantage to a raised garden bed, though – it offers better drainage. Nevertheless, that doesn’t mean you can choose any location by being complacent about your raised garden bed method.
Not to worry, we’ll share a few tips on how to choose your site, such as:
- Make sure the soil isn’t hard-packed or waterlogged since this may lead to drainage problems.
- It’s preferable to choose the sunniest location for your garden. Most vegetables require at least 8 hours of sunlight every day.
- Stay away from areas where the soil is wet or low. Soggy soil does not go well with vegetables.
- Test your soil for any lead, and make sure to remove weeds or perennial weeds you find.
- If there are rocks that prevent water from running off, remove the rocks and any obstruction.
- A good rule of thumb for the right pH of the soil should be between 6.2 – 6.8.
Choosing Your Raised Bed
Standard raised garden beds are usually 2 to 4 feet wide and 6 inches in height. You can choose between making your own or buying one.
Between the two, purchasing raised garden beds are more convenient but can also be more costly depending on which you buy. Raised garden beds can be made of wood, recycled plastic, concrete, aluminum, stone, or even galvanized steel.
One thing to remember about raised beds is the depth. Raised beds with more depth will naturally mean more soil depth. Choosing a raised bed with 10 to 12 inches of depth is adequate.
In effect, a higher soil depth allows your roots to grow freely and holds more moisture; thus, watering your vegetables won’t be as frequent as a shallow raised bed.
One drawback to choosing a raised bed with more soil depth is cost. Since you’ll need to fill 10 to 12 inches of your bed, it also means you’ll need to purchase more soil.
If it’s your first time using a raised bed, it might be best to start with one raised bed to minimize costs early on. Speaking of, let’s touch more on this.
How Many Raised Beds Do You Need?
The number of raised beds depends on:
- Your budget
- The size of your garden
- How many vegetables you want to grow
Budget is a matter of personal preference, while the size of your garden is a factor you’ll have to measure appropriately.
For example, if your garden measures 500 feet, and you buy raised beds measuring 4ft x 20ft, you would be able to fit 6 raised beds in your garden.
If you buy raised beds measuring 4ft x 8ft, you would be able to fit 15 raised beds.
This is just a rough guide since other factors also come into play, such as the path width and flexibility of accessing each bed in your vegetable garden.
Don’t Forget Water Irrigation
A common mistake most gardeners make is water irrigation. Sunlight is important, especially for young plants.
However, water is a staple element to keeping your vegetables healthy and fresh. More importantly, water allows plants to perform three critical functions: photosynthesis, transpiration, and nutrient distribution.
There are many ways to irrigate your plants. Conventional sprinklers and an automatic sprinkler system are common options; however, these don’t provide water for your soil and plants efficiently.
The problem with conventional sprinklers for raised beds is the walls of the bed block water. Automatic sprinkler systems provide better water efficiency but only wet foliage.
As a result, damp foliage easily leads to fungi and bacteria. That’s something you want to avoid and keep in mind if you want to grow fresh vegetables in your garden.
So what is the best way to irrigate your plants? Either through drip irrigation or manually hosing your plants.
What Is Drip Irrigation and How Does It Work?
Drip irrigation is a tube-like system that directs water precisely where it needs to go.
It works by delivering uniform amounts of water above the soil or directly into the root or growing zone. In effect, drip irrigation prevents excess water from running off as well as evaporation and wind drift.
One thing to note about drip irrigation is it takes more work and effort to install than sprinkler systems. 7 essential components make up a drip irrigation system:
- Filter – Prevents any debris from clogging the tube.
- Valve – One of the essential components used to control the flow of water. Some valves come equipped with an automatic timer for better programming and control.
- Hence, the name regulator, a pressure regulator, regulates water pressure since most homes have a pressure that’s too high for a drip system. This constant low-pressure flow will contn=inue to operate even if the water supply pressure in your home fluctuates.
- Dripline – Also referred to as the distribution line, the dripline transports water from your valve to your plants. You can connect your dripline to the pressure regulator through a tubing adapter. Driplines also come in brown or black so they can blend in with the soil or mulch.
- Backflow Preventer – You wouldn’t want the water from your irrigation system to get sucked back into your drinking water supply. It’s unsanitary and dangerous for anyone’s health. That’s exactly the role of a backflow preventer. When your drip irrigation system is turned off, it prevents water from being sucked back in.
- Emitters – Emitters connect to your tubing to deliver water into the soil. Most plants will require at least one or two emitters.
- Flush valve – Prevents water from leaking out the end of your dripline. It’s encouraged to remove your flush valve every 6 months to a year to clean any debris, algae, or sediment inside the tubing. Once you’ve cleaned all the debris, you can re-apply the flush valve to your dripline.
Drip systems are better alternatives to sprinkler systems since they efficiently regulate water compared to sprinklers. Furthermore, drip systems are best for locations with a scarce water supply.
If you have a hard time finding a consistent, clean water supply for your plants, you may need drip irrigation for your garden.
You can also check out this video [R] to learn more about how to create your own drip irrigation system.
Manually Hosing Your Plants
You could manually hose your plants, but keep in mind you’ll have to stick to a strict routine. No excuses.
This shouldn’t be too hard, though. You could have a cup of coffee and hose your plants to start the day. It’s an ideal weekend starter for most gardeners.
The only problem – weekdays. If you have a heap of tasks and responsibilities to perform on weekdays and aren’t confident enough to manually hose your plants when needed, then perhaps you may need a drip irrigation system.
Don’t worry. We’ll touch more on this later and how to water your soil and plants effectively.
Step 2: Pre-Planting
The pre-planting stage is where we’ll choose the right soil to give your plants the proper aeration, moisture retention, and nutrients essential to its growth.
Sorting out vegetables and understanding the compatibility of each plant from another is also vital to a successful yield.
Choosing the Right Soil
Since you’re starting from scratch, we recommend following these proportions: 50% organic top soil and 50% compost. Compost can be anything from organic matter to even shrimp or chicken compost.
Alternatively, this proportion might suit you better if you’re growing a variety of plants in your vegetable garden and want it to last longer:
- 1/3 Vermiculite
- 1/3 compost (Chicken, Steer, Shrimp, etc.)
- 1/3 Peat Moss
The Vermiculite adds aeration and drainage to your soil & plants, while the peat moss is mostly for water retention.
You could blend the Vermiculite with Perlite to make it a better blend; however, this might be expensive if you’re still new to raised bed gardening.
Saving on Soil Costs
With the soil recipe we mentioned above, this may be a costly soil mix, especially if you have a ton of raised beds to fill. Let alone if you have 30-inch raised beds, for instance, you may want a soil mix that doesn’t break the bank.
So here’s an essential tip about gardening in raised beds: Most root systems of annual vegetables you want to grow will go as deep as 12ft to 18ft, at most.
With a 30-inch raised bed then, you’ll be filling your bed with soil that won’t do as much benefit for your vegetables or your yield. As a result, you’d be spending double the expense for half the amount of soil you won’t need.
To save on soil costs, you’ll most likely have to fill only 40 to 50% of your raised bed with the recipe we mentioned above (1/3 Vermiculite, 1/3 compost, & 1/3 peat moss), or you can also go for 25% compost, 50% top soil, and 25% organic matter.
Now that you have 40 or 50% of your soil mix recipe ready for your raised beds, what do you do with the 50 to 60% of empty space?
Two words: Organic matter. You don’t have to buy organic matter or create an optimal recipe. You can use “passive” or anything organic laying around your home, such as:
- Logs
- Sticks
- Leaves
- Straw
- Bush or tree trimmings
- Grass clippings
- Vegetable trimmings
- Any animal manure
Using any of these to fill 50 to 60% of your raised bed and 40 to 50% of your soil mix recipe on top should help you save on costs while still using top-quality soil for the plants and vegetables you want to grow.
Finally, you can add mulch as a top dressing soil to add a protective layer and protect your soil structure from weather elements, such as rain.
Sorting Your Vegetables
As excited as we are for you to begin your raised bed gardening journey, understanding the ideal plants to grow along with each plant’s compatibility will help you plan what to plant in your raised bed.
Here is a list of vegetables ideal for raised beds:
- Garlic
- Carrots
- Radish
- Lettuce
- Onions
- Tomato
- Potato
- Parsnip
- Beetroot
- Cauliflower
- Swede
- Spring Onion
Any of these vegetables would be excellent to start with whether you have one or two raised beds. It doesn’t matter if you have a small garden or a larger space. What matters is being able to start.
Now, if you have a fairly large raised bed and own two or three beds, you might want to look into companion planting.
This allows you to plant different varieties of vegetables beside one another while optimizing the soil, provide better plant health, and regulate the shade and wind.
Understanding Plant Compatibility
Plant compatibility allows you to plant different plants beside each other, such as carrots & beans, onions & cabbage, squash & corn, potatoes & garlic, and so forth.
Taken further, tomato plants planted with basil or mint improve the flavor and growth of tomatoes. Planting parsley and marigolds with asparagus will protect your crops from asparagus beetles.
For the full list of plant compatibility, this chart should give you more options to try. [R]
Like any other companionship, it’s also possible for plants to have enemies or incompatibility, which harms your soil and yield over time.
Some plants worth mentioning include:
- Tomato plants and corn, dill, or potatoes do not go well together.
- Strawberries and tomatoes, peppers, cabbage, or eggplants are incompatible.
- Beans don’t go well with onions or garlic.
- Squash and potatoes are not a good combination.
It’s essential to take note of plant compatibility and incompatibility before the planting stage. Preferably, you’ll want to list down all the vegetables you want to plant in your raised bed before actually buying the seeds or young plants.
Step 3: Planting Your Vegetables
When planting your crops, take note of the appropriate spacing for each plant, along with the spaces between each row of plants.
Without appropriate spacing, this can affect your crops’ growth and root system, thus leading to a lower yield or poor harvest.
Plant Spacing
The significance of plant spacing cannot be understated. Proper plant spacing prevents each plant from competing with one another for nutrients and water.
Every plant has a specific plant spacing requirement for a healthy yield of crops. We won’t list all the requirements for each plant, but we’ll name a few for more common plants you would want to grow in your garden:
- Carrots require at least one to two inches of space between each plant and 12 to 18 inches per row.
- Peppers require 14 to 18 inches of space apart and 18 to 24 inches per row.
- Baby leaf spinach requires 0.5 to 1 inch of space and 12 to 18 inches per row.
- Tomatoes need 24 to 36 inches of space and 48 to 60 inches per row.
- Kale requires 12 to 18 inches of space and 24 inches per row.
With so many plant varieties, you can check the full list of plant spacing requirements here [R].
Don’t forget to ensure an acceptable path width or space for you to walk between each row of plants without destroying the roots or the crops in itself.
The Right Time to Plant
Timing is everything to an abundant crop harvest. Depending on the plant you want to grow, it’s crucial to segregate warm-seasonal crops from cold-seasonal crops.
Factors such as soil temperature and frost dates determine the right growing season for every plant in your garden, along with the proper time to harvest or sow each one.
To give you a general guide, the right time to plant warm-season crops is during summer, late spring, and early autumn. On the other hand, cold-season crops are ideal during early spring or late summer, or autumn.
The best time to plant warm-season plants is during the last frost of winter so that you can harvest them before the first frost of the next cold season. Cold-season plants should be planted starting at the end of the warm season for the best results.
Warm-seasonal Plants
If you live in a tropical region, the following plants are perfect for this type of weather:
- Tomatoes
- Sweet Corn
- Squash
- Lima beans
- Pumpkins
- Okra
- Eggplant
- Watermelon
- Sweet potato
- Muskmelons
- Cucumber
Take note: The minimum soil temperature for warm-seasonal plants is 10 oC while the optimal temperature would be 16 oC. With air and soil temperatures between 18 to 30 oC, you should expect a healthy growth and harvest.
Sweet corn and tomatoes are considered tender crops you should plant at least 2 weeks after the last frost.
The remaining crops mentioned in the list above are categorized as very tender, which should be planted 3 weeks after the last freeze or frost.
If you want to grow your greens off-season in your garden, you can do so with cloches, cold frames, or row covers to shield your produce from the cold weather.
Cold-seasonal Plants
Cold-seasonal plants grow best in temperatures between 21 to 24 o C and require a minimum temperature of 5 to 10o C.
Cold-seasonal types are classified into either hardy or half-hardy plants. Hardy greens or produce should be planted 2 to 4 weeks before the last freeze in spring, while half-hardy greens should be planted on the day of the last freeze in spring.
Examples of hardy produce include:
- Cabbage
- Garlic
- Parsley
- Onions
- Asparagus
- Spinach
- Turnips
- Kale
- Peas
- Rhubarbs
- Horseradish
- Broccoli
- Radish
As for half-hardy produce, some worth mentioning are:
- Carrots
- Lettuce
- Potatoes
- Cauliflower
- Endives
- Chinese Cabbage
- Chard
- Beets
- Parsnips
- Celery
Be sure to take note of these before planting them in your raised bed. This will allow you to produce a healthy yield and make the most out of each crop you harvest.
It also helps to have a USDA zone map guide as a reference to help keep the growing season of each plant optimal. You can use this zone map to learn more about the growing zone in your area. [R]
Step 4: Maintenance
Once you’ve completed steps 1 to 3 and created a lush garden in front of you for the world to see, the last step left to a raised bed Eden of leafy greens & produce is proper maintenance.
Proper maintenance of your plants results in a healthy harvest.
Even if you’ve done everything right, from choosing the right location down to mapping the appropriate growing zones for each vegetable, leaving your crops to fend for themselves isn’t exactly green thumb material.
Neither does it create that lush garden you pictured during your daydreaming episodes.
That being said, here are a few good practices to follow if you want to achieve a lush, bountiful garden:
- Choose the right plant for the right place. As we mentioned earlier, cold-season and warm-season are vital notes to take down. You can’t grow potatoes in a tropical climate no matter how much positivity you give it.
- Refrain from changing the environment, sunlight, or watering of your produce. As much as change adds resiliency for us humans, plants aren’t the most adaptable to change. Their sensitivity means a big no-no to change the lighting or height of the plant. Spontaneous changes affect its growth.
- Be sure to weed your plants every week or so. If you don’t remove weeds as soon as possible, each plant will start to compete for nutrients and water.
- Trim any dead ends you find. This means you’ll have to monitor your product as much as possible if you want those greens to keep growing. Any spotted marks or brown color you notice is considered a dead-end you should remove.
- Certain plants have specific feeding requirements or fertilizer needed to keep them healthy. Fertilizers not only provide nutrients for your product but also provide pest control benefits.
- Pest control is a serious issue for all gardeners, and the right fertilizer can help keep pests away.
- Last but not least, don’t overwater your plants. Too much can be harmful to your plant’s health and growth. How do you know when you’re over-watering your plants? We’ll touch more on this in the later sections.
With all the steps covered to growing plants in raised beds, let’s dive into the benefits of using a raised bed along with garden essentials to help you along the way!
Infographic
The Benefits of Raised Bed Gardening
Raised beds offer several advantages, especially for first-time gardeners. If you have poor soil, raised beds are an excellent solution.
For many, poor soil is a serious problem because it drains away the nutrients needed for your plants.
Other problems, such as poor drainage, low yield, and even weed control, are issues you can prevent and minimize by using a bed.
Let’s go over a few benefits in detail.
Improved Yield
One of the main benefits of planting in a flat bed is that the temperature rises more quickly than compacted dirt. Additionally, soil in a bed increases air and water movement, allowing roots to collect nutrients easily.
If you have trouble with space in your garden, then choosing a flat bed provides more space for you to work with. A traditional garden layout will use relatively more space or half of your garden space.
Compared to using a bed, enclosed beds can cut the overall space needed for your garden by half or even more! In effect, you’ll be able to grow more produce in your garden and expect a higher yield.
Minimized Pest or Weed Control
Sure, a large garden comes with its fair of benefits, but maintaining your garden from snails, birds, rodents, and other pests can be challenging.
A raised vegetable bed results in a more densely planted structure. As a result, weeds have minimal room to grow, and even if they do, it’s easier to pull them out than in a large-scale garden.
You can also use metal screens, row covers, or even netting to easily protect each bed from any birds or rodents.
The compact size of a flat bed provides convenience compared to a traditional garden, allowing you to install and remove any protective layer above your produce easily.
Enhanced Soil Quality
We admit, investing in a flat bed wasn’t at the top of our list when we started growing our own produce. To our amazement, a flat bed improves the soil quality for two reasons: better control and less exposure.
When we say better control, we mean choosing the ideal soil mixture from the start. Choosing the right soil blend gives you much more control than relying on plain old garden soil.
Of course, this is not to say that a traditional garden doesn’t have great soil quality. It’s simply easier to control the soil quality you want for your plants, especially if you’re looking to grow some with stricter conditions & limitations.
A flat bed layout also has less foot traffic than a traditional garden. When soil is constantly stepped on, it becomes compacted and, over time, decreases the quality.
Better Drainage
Depending on your location, it can be a struggle to find good soil. Your site may be poor and have less than the ideal conditions for growing plants effectively.
If the native soil in your area drains too slow or too fast, investing in a bed can save you from all this trouble and continuous trial and error.
Remember what we said about poor soil? This can get in the way of your yield and plant’s health, which we all know we don’t want.
Convenient
When you’ve been tending a garden for as long as a little over a year, you may start to notice your back starting to ache or your knee feeling sore.
Enclosed beds offer a convenient way of protecting your plants and your back. Anyone with physical limitations can benefit from an enclosed bed.
The reason being, there’s a wide variety of beds you can choose from. The standard is typically two feet high and three or four feet wide. However, some can go higher than two feet and wider than four feet.
It’s possible to have a four-foot-wide bed that’s as tall as 3 feet. A two feet high & three-foot-wide bed is adequate if you plan to garden from a wheelchair.
Depending on the dimensions you may need, enclosed beds have more convenience and are much easier to use than traditional gardens.
Infographic

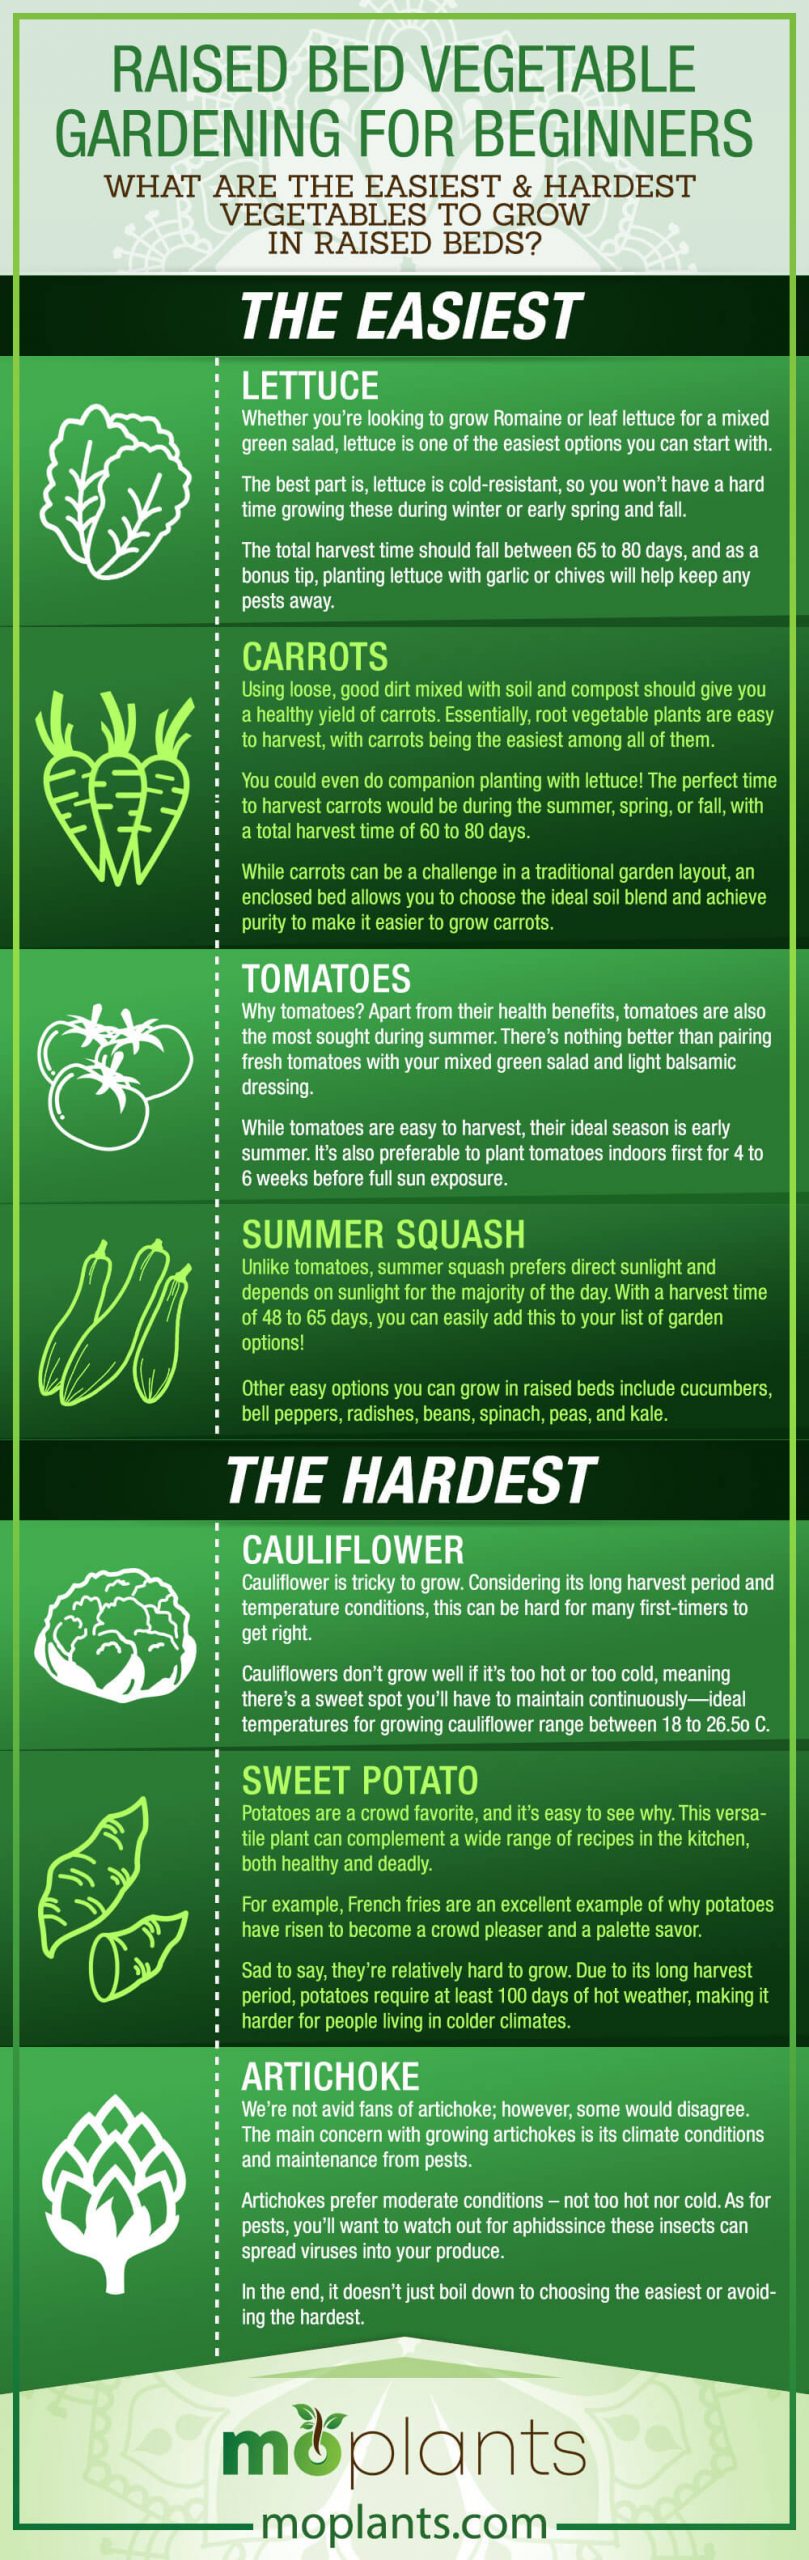
What Are the Easiest & Hardest Vegetables to Grow in Raised Beds?
It’s true that rich soil can affect your overall produce and yield. Other factors, such as soil pH, soil moisture, air circulation, adequate sunlight, etc., are vital parts of any garden system.
Needless to say, you can also choose the plant the easiest vegetable plants and be made aware of the hardest to help you diversify your crop yield.
Since this is your first time planting with an enclosed bed, we felt this section might help you during the planning stage.
The Easiest
You can plant vegetables that don’t require a lot of effort or work on your part while saving money by choosing the right vegetable options.
Here are a few of the easiest to harvest in your garden:
Lettuce
Whether you’re looking to grow Romaine or leaf lettuce for a mixed green salad, lettuce is one of the easiest options you can start with.
The best part is, lettuce is cold-resistant, so you won’t have a hard time growing these during winter or early spring and fall.
The total harvest time should fall between 65 to 80 days, and as a bonus tip, planting lettuce with garlic or chives will help keep any pests away.
Carrots
Using loose, good dirt mixed with soil and compost should give you a healthy yield of carrots. Essentially, root vegetable plants are easy to harvest, with carrots being the easiest among all of them.
You could even do companion planting with lettuce! The perfect time to harvest carrots would be during the summer, spring, or fall, with a total harvest time of 60 to 80 days.
While carrots can be a challenge in a traditional garden layout, an enclosed bed allows you to choose the ideal soil blend and achieve purity to make it easier to grow carrots.
Tomatoes
Why tomatoes? Apart from their health benefits, tomatoes are also the most sought during summer. There’s nothing better than pairing fresh tomatoes with your mixed green salad and light balsamic dressing.
While tomatoes are easy to harvest, their ideal season is early summer. It’s also preferable to plant tomatoes indoors first for 4 to 6 weeks before full sun exposure.
Summer Squash
Unlike tomatoes, summer squash prefers direct sunlight and depends on sunlight for the majority of the day. With a harvest time of 48 to 65 days, you can easily add this to your list of garden options!
Other easy options you can grow in raised beds include cucumbers, bell peppers, radishes, beans, spinach, peas, and kale.
The Hardest
Cauliflower
Cauliflower is tricky to grow. Considering its long harvest period and temperature conditions, this can be hard for many first-timers to get right.
Cauliflowers don’t grow well if it’s too hot or too cold, meaning there’s a sweet spot you’ll have to maintain continuously—ideal temperatures for growing cauliflower range between 18 to 26.5o C.
Also, cauliflower is vulnerable to cabbage worms, requiring even more maintenance on your part.
Sweet Potato
Potatoes are a crowd favorite, and it’s easy to see why. This versatile plant can complement a wide range of recipes in the kitchen, both healthy and deadly.
For example, French fries are an excellent example of why potatoes have risen to become a crowd pleaser and a palette savor.
Sad to say, they’re relatively hard to grow. Due to its long harvest period, potatoes require at least 100 days of hot weather, making it harder for people living in colder climates.
However, with enclosed beds, you could use row covers to protect your potatoes from the cold and are much easier to manage than
Artichoke
We’re not avid fans of artichoke; however, some would disagree. The main concern with growing artichokes is its climate conditions and maintenance from pests.
Artichokes prefer moderate conditions – not too hot nor cold. As for pests, you’ll want to watch out for aphidssince these insects can spread viruses into your produce.
In the end, it doesn’t just boil down to choosing the easiest or avoiding the hardest.
Before planting, any gardener understands that studying the essential food requirements and conditions for their produce is vital to growing any plant. Speaking of, the next section will discuss essentials to always keep in mind.
Infographic
Gardening Essentials You Need to Remember
How to Water Your Plants the Right Way
There are plenty of watering strategies you can use to improve the quality and health of your yield. However, for first-timers, always learn the fundamentals.
Watering your plants the right way is as crucial as how humans need sleep. Without any of that H20, not even the best climate conditions will help.
One thing to remember about growing plants in humid or drier conditions is losing moisture faster, so you’ll need to water your plants and soil frequently.
An excellent way to test if your soil has enough moisture or needs more water is to stick your finger and check if the soil is moist at least 2 to 3 inches below the surface.
We also recommend watering your plants with a watering sprinkler or can. Dumping all the water damages your plants. If you want to learn more watering strategies, you can do so here. [R]
How to Choose the Best Soil
This would’ve been a different case if you weren’t using enclosed beds. A traditional garden might require more factors to consider, such as soil pH or measuring the amount of clay soil or sandy soil you have.
Sandy soil can be great for most plants, but too much is also detrimental. Luckily, enclosed beds allow you to have more control of your soil blend.
Most would recommend a 50/50 mix of top soil and compost; however, we’ve found an even better mixture if you want to keep your soil healthy for an extended period of time.
As mentioned earlier in the previous sections, choosing the best soil for enclosed beds is as follows:
- 1/3 Vermiculite
- 1/3 compost (Chicken, Steer, Shrimp, etc.)
- 1/3 Peat Moss
Since Vermiculite holds on to a lot of water, you can balance this out by including Perlite since it holds on to less water. This blend gives you a balanced aeration for your plants and soil.
Alternatively, you can go for an organic raised bed gardening mix. Take note that an organic mix is a healthier option you should consider using.
It’s worth noting that non-organic products contain synthetic chemicals and pesticides that are harmful to your health, the environment, and pets.
Non-organic potting soil mixes will have fewer minerals and nutrients, and overall, a potting soil mix with less organic natural matter.
On the other hand, organic mixes provide more moisture retention, more nutrients, improved water accessibility for your plants, fewer pesticides or chemicals, and a better-tasting yield.
Keep Yourself Informed of Growing Season
Growing season tells you the average time the temperature stays above the freezing point annually day and night. Generally speaking, it also indicates how long your plants will grow in a given year.
You can’t grow summer plants during the winter, and you also can’t grow cold-seasonal plants during the summer. You also have to keep track of the harvest time, which can vary per plant. [R]
To learn more about growing seasons, using a planting calendar can help you identify the right time to plant.
Should You Buy Small Plants or Seeds?
Most first-timers face the confusion of buying seeds or starter plants. Between the two, seeds are more affordable and simpler to grow.
We recommend buying starter plants if:
- You want to harvest a plant with a short growing season.
- It’s harder to grow using a seed.
Stop Right There, Gardener
Even with all the steps and fundamentals covered, there are a few tips we’d like to share and common mistakes you’ll want to avoid early on.
These are the finishing touches to ensure a healthy and productive yield.
4 Gardening Tips to Keep in Mind
Tip #1
Use the USDA hardiness zone to help you define what you’re allowed to grow and when you can grow certain plants.
Knowing when your frost dates start and end is critical to identifying when you can grow your spring, summer, or winter plants.
Tip #2
A good standard to go by when buying beds is a bed that’s more than 12 inches tall.
Taller beds provide better flexibility if you decide to grow deep-rooted plants like radishes or carrots. Additionally, taller beds are one way to improve workability so that you don’t have to arch your back all the time.
Tip #3
Go for succession planting if you plan to grow in bulk. If you grew 100 carrots all at once, keeping these in your inventory or selling these could become a problem.
Succession planting allows you to efficiently control your crop yield while still achieving your desired results. To learn more, this guide can help you. [R]
Tip #4
If you want more yield out of certain plants that have a longer growing season, you can use the cut and come again method. This works great for head lettuce.
This method aims to help you have successful harvests rather than harvest from scratch after your plants mature.
5 Common Mistakes to Avoid
- Rushing when choosing your garden site. Tomatoes and peppers love the sun and prefer a warmer soil temperature, but if you choose a garden site with a lot of shade, you won’t be able to grow these. Choosing the wrong location is a common mistake most first-timers make. Consider the amount of light to figure out the best location.
- Buying crappy soil. One of the worst mistakes you could make when starting out is investing in bad soil, which leads to poorer nutrition, lower yield, and subpar quality.
- Refusing to add mulch. Adding mulch is an underestimated step for most first-timers. Think of mulch as a protective layer that protects your soil from harmful elements, such as UV rays, and overall, protects your soil life. The best options for mulch would be straw and anything that doesn’t decrease your soil’s nitrogen content.
- Not allocating the proper path width. When allocating the space needed for your garden, be sure to allocate adequate space for pathways too. How else will you be able to manage your garden if you can’t reach most of your beds? It might help to draw a layout along with the placement of your beds before planting.
- Not using labels. Labeling may only play a small role, but it can help you organize if you have a large harvest or if you’re forgetful. This is even more beneficial in the early stages since you won’t be able to tell which variety sits on a certain bed. For this reason, we recommend labeling your beds as soon as you fill your bed with soil and finish planting.
Final Words
We hope this article was able to help you in learning how to start a raised bed garden. Before you go, we’d love to hear your thoughts on your garden practices! Feel free to share them below!
