So, all this extra time you have at home has left you incredibly bored. You have finally decided to make your own vegetable garden. The problem is, you know absolutely nothing about plants, let alone how to care for them.
Fear not. We are here to help and tell you all you need to know to get you started on vegetable gardening.
What You Will Need for Vegetable Gardening for Beginners:
As with starting any new hobby, you need to invest in good tools. Having well-made tools can make vegetable gardening for beginners much easier.
Moreover, if you end up loving gardening, you know your tools will last for a long time with proper maintenance.
Tools You Absolutely Need
Without further ado, here are the tools you need to get you started.
- Round-tipped shovel for digging
- Fork for turning and loosening the soil
- Steel bow rake for cleaning and leveling
- Hoe or cultivator for weeding
- Hand trowel or hori hori for transplanting and weeding
- Hand cultivator also for transplanting and weeding
- Hose and nozzle or watering can
Additional Tools You Will Appreciate (Optional)
- Garden gloves with nitrile-coated palms and fingers
- Bypass snips for pruning and cutting
- Sharp scissors or a garden knife for harvesting or pruning
- Kitbag to tote your gear, seeds, and hand tools
- Wheelbarrow for transporting sod, dirt, and compost
- Lightweight landscaper bag for gathering leaves, weeds, etc.
- Kneeling pad to cushion your knees
- Weed torch, to lessen the strain on your back
How To: Vegetable Gardening for Beginners
So, you bought all the gardening tools you need. What now? Follow these steps, and you will be eating your own produce in no time.
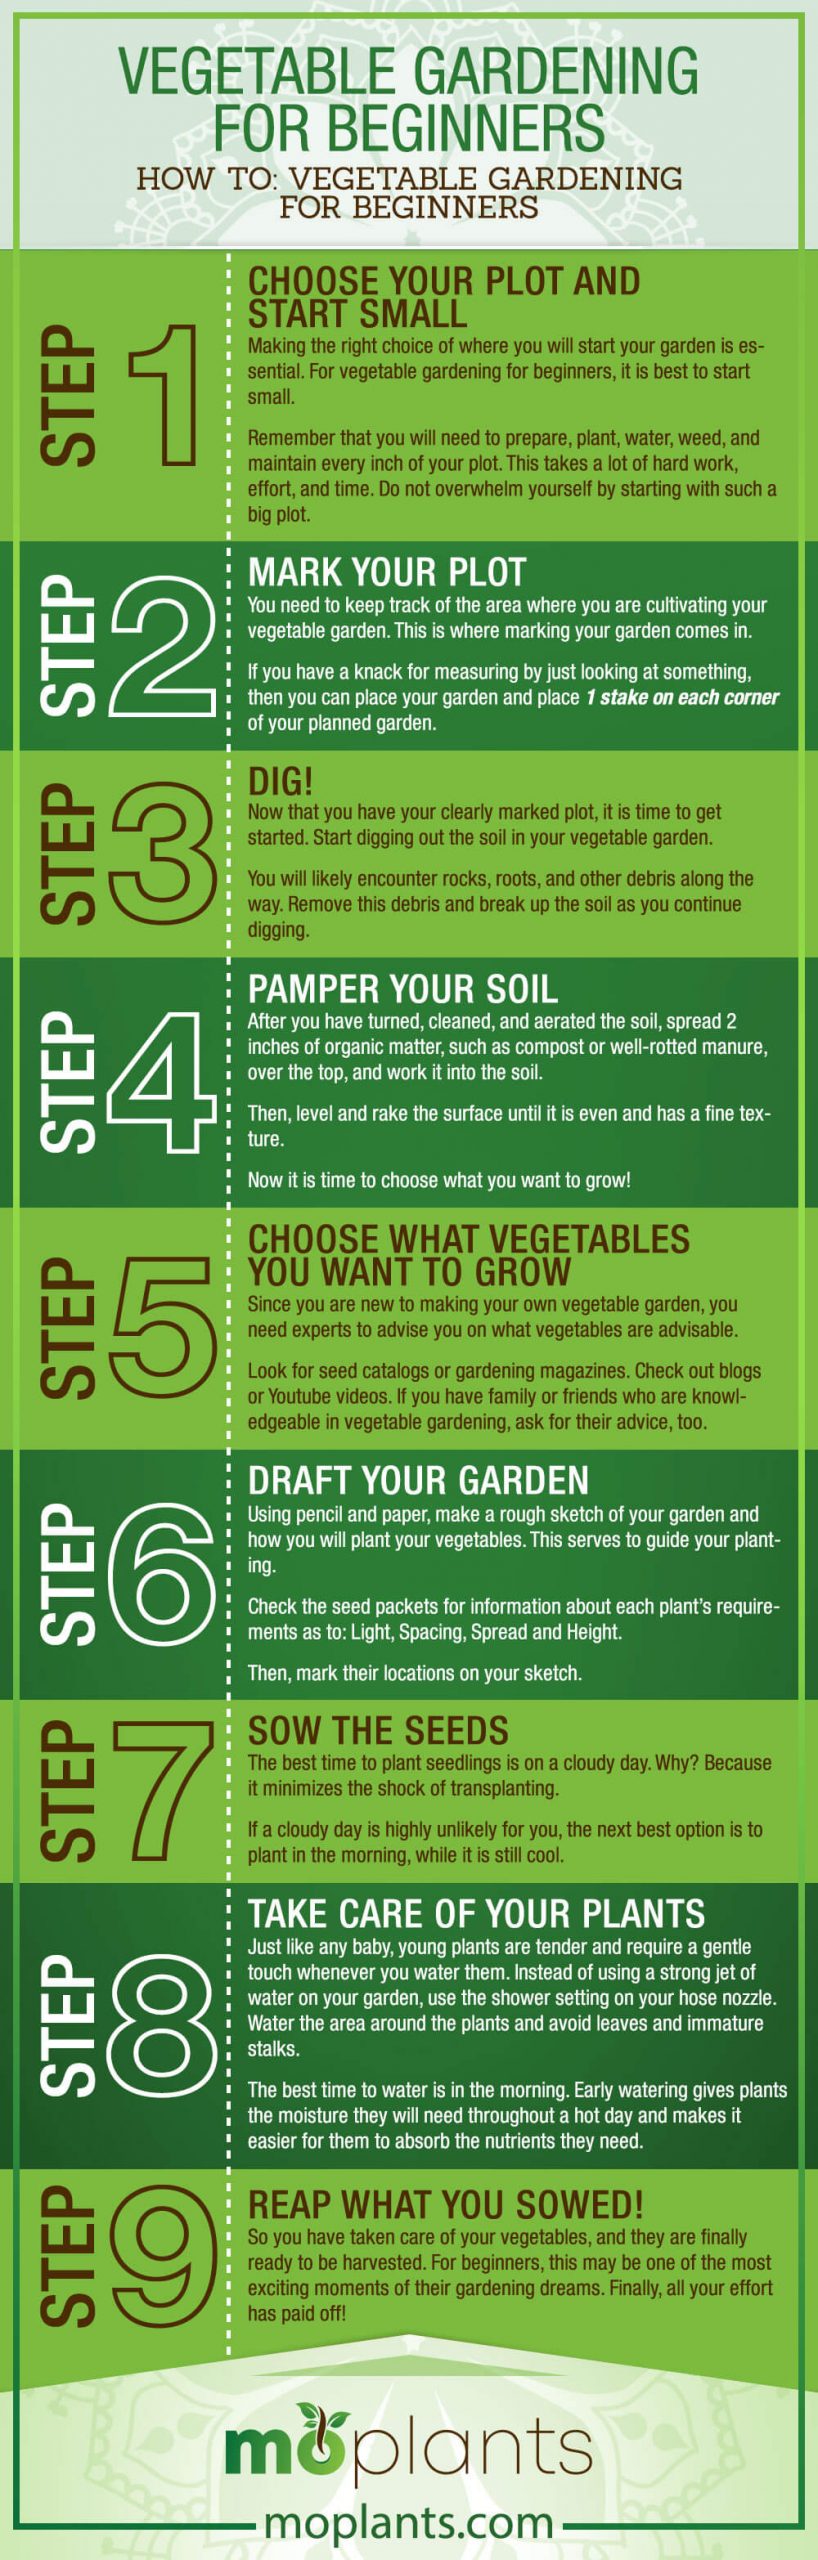
Step #1: Choose Your Plot and Start Small
Making the right choice of where you will start your garden is essential. For vegetable gardening for beginners, it is best to start small.
Remember that you will need to prepare, plant, water, weed, and maintain every inch of your plot. This takes a lot of hard work, effort, and time. Do not overwhelm yourself by starting with such a big plot.
What is a Good Size?
A good size for your starting vegetable garden can be as small as 8 x 8 feet. This gives you 64 square feet to work with— plenty of space for gardening what you want to grow. Plus, it is easy enough to maintain a vegetable garden of that size.
Other Factors You Need to Consider When Choosing Your Plot
- Level – Make sure to choose a level or flat area to garden. This makes your life much easier and ensures that all your plants have the best chance of growing well. You can also choose to create a flat and raised bed if your area’s leveling is a problem for you.
- Sunlight – Your garden has to be in an area that receives 6 to 8 hours per day.
- Shelter – You know how much bad weather can affect your garden. They can destroy months of hard work. So if your location is prone to strong winds, for example, select a plot that is sheltered from the elements.
- Water – Since you have to water your garden every day, choosing a plot that is near some access to water, like a faucet, will make watering that much more convenient. After all, you don’t want to have to carry buckets of water back and forth to and from your garden.
What If My Plot is Too Small?
We know not everyone has an expansive backyard to build all the vegetable gardens they want.
Many have limited spaces to garden. So if you are one of those who only has 20 to 25 square feet of space, the good news is there is still a way for you.
There are 2 ways you can maximize the size of your small garden. These are the French Intensive Method and through the use of Raised Beds.
French Intensive Method (Double-Digging)
This method requires more preparation than usual, but once your vegetables are planted in your garden, you will need less watering, fertilizing, and weeding.
Double-digging creates loose, deep, friable soil that lets roots grow deeper than normal (about 3 feet deep).
The extra depth makes it possible for vegetables to be planted more closely together, increasing the plant density to about 2 to 5 times greater than a regular garden of the same size.
Raised Bed
While the French Intensive Method requires that you dig deeper for your garden, the use of permanent raised beds lets you create layers of beds, so you have more space for gardening.
Note that when building a wooden frame for your raised beds, do not use treated lumber.
This is because the chemicals used to preserve the wood are highly toxic and will leech into your vegetable garden, leading to absorption by your vegetables.
Step #2: Mark Your Plot
You need to keep track of the area where you are cultivating your vegetable garden. This is where marking your garden comes in.
If you have a knack for measuring by just looking at something, then you can place your garden and place 1 stake on each corner of your planned garden.
If you need clearer marks, use atape measure to precisely measure your plot. Then, mark your perimeter by placing 1 stake on each corner and connecting them with string, so you end up with a clear square for your garden space.
PRO TIP!
Install plastic or metal edging around the perimeter of your small garden! This discourages weeds from growing into your freshly prepped soil. The deeper the edging, the better it works.
Step #3: Dig!
Now that you have your clearly marked plot, it is time to get started. Start digging out the soil in your vegetable garden.
Make a Grid
- Use a square-end spade to create equal sections in a grid pattern on your garden.
- Using a fork, lift the sod from each section and shake out the soil.
- You can choose to discard the sod or use it to level lower areas in your yard.
Now Go Deeper
Using a fork or pointed shovel, dig deep and turn your garden’s soil to a depth of at least 12 inches. The optimal depth is 18 to 24 inches.
You will likely encounter rocks, roots, and other debris along the way. Remove this debris and break up the soil as you continue digging.
Step #4: Pamper Your Soil
After you have turned, cleaned, and aerated the soil, spread 2 inches of organic matter, such as compost or well-rotted manure, over the top, and work it into the soil.
Then, level and rake the surface until it is even and has a fine texture.
Now it is time to choose what you want to grow!
Step #5: Choose What Vegetables You Want to Grow
Gather Reference Materials
Since you are new to making your own vegetable garden, you need experts to advise you on what vegetables are advisable.
Look for seed catalogs or gardening magazines. Check out blogs or Youtube videos. If you have family or friends who are knowledgeable in vegetable gardening, ask for their advice, too.
Remember to consider what kind of fresh vegetables you want. Grow something you love, and you can eat.
Then, once you have made your choice, write them down.
Refer to a Planting Chart
You need to check a planting chart that is specific to your region and zone.
This helps you determine which vegetables can be directly sown, which seedlings you can start at home by yourself, and which vegetables need to be picked up from a nursery.
Tips on Choosing Your Plants
- If you plan to plant in small plots and containers, you can choose varieties labeled “bush,” “compact,” or “dwarf.”
- Choose disease-resistant plant strains.
- If you can, choose a cross-section of varieties with different maturation dates to extend and maximize your growing season.
Purchase Your Seed Packets
If you are wondering how much you need to buy, figure out how much each plant will produce and consider this with your plot’s size.
It is also good to remember that you should buy an extra seed packet or two if you want to preserve any of your harvests.
Step #6: Draft Your Garden
Make A Rough Blueprint
Using pencil and paper, make a rough sketch of your garden and how you will plant your vegetables. This serves to guide your planting.
Check the seed packets for information about each plant’s requirements as to:
- Light
- Spacing
- Spread
- Height
Then, mark their locations on your sketch.
It Does Not Have to be Straight
Your planting scheme does not have to be limited to straight rows. You can plant in staggered rows, mounds, and raised beds.
Just remember to leave enough space for pathways to walk on. These pathways should be around 18 to 24 inches wide.
PRO TIP!
- Separate the tall plants and those that require supports, like corn, peas, tomatoes, and beans. Place them on the north side of your vegetable garden. This prevents these taller plants from shading shorter ones and depriving them of sunlight.
- Remember that the sun travels from east to west, and all your plans will need sunlight.
- You can also include space for companion plants, herbs, or flowers.
What is Companion Planting?
This is a practice of using complementary plants that provide natural pest control, improve flavor, and attract important pollinators into your garden.
An example is marigolds, which are considered one of the best for pest control.
Basil, when planted near tomatoes, are known to improve the latter’s flavor. Lettuce like being protected by and close to onions and radishes.
Oregano, rosemary, sage, and thyme are flowering herbs known to repel many pests and simultaneously act as bee magnets. Planting them near fruits or vegetables that need pollination to produce fruit
Step #7: Sow the Seeds
The best time to plant seedlings is on a cloudy day. Why? Because it minimizes the shock of transplanting.
If a cloudy day is highly unlikely for you, the next best option is to plant in the morning, while it is still cool.
How to Plant
- First, sprinkle a pinch of bone meal into each hole where you want to grow your seedlings.
- Next, set the seedlings in place and gently gather the soil around each stem.
- Firm the earth around them but do not pack it.
- Allow your seedlings to settle by giving them a soft shower of water.
PRO TIP!
Check the packet of each seed. If it has specific instructions for sowing, follow those instead. Afterward, firm the soil and water it gently.
In case any of your vegetables require staking, set stakes in place as early as you can to prevent your growing plants from breaking.
Leave Space!
Certain types of vegetables require you to leave some space so you can maximize your growing season.
Leave space for repeat sowings of lettuce, salad greens, and heat-lovers, such as peppers, tomatoes, melons, and cucumbers that will benefit from the later season.
Step #8: Take Care of Your Plants
How to Water
Just like any baby, young plants are tender and require a gentle touch whenever you water them. Instead of using a strong jet of water on your garden, use the shower setting on your hose nozzle. Water the area around the plants and avoid leaves and immature stalks.
The best time to water is in the morning. Early watering gives plants the moisture they will need throughout a hot day and makes it easier for them to absorb the nutrients they need.
Watering in the hot afternoon sun can shock the young plants and cause their tender leaves to scorch.
You should also avoid watering your garden in the evening as it can lead to excess moisture staying on the leaves in cool overnight temperatures. This makes your plants susceptible to diseases like powdery mildew and damping-off.
PRO TIP!
If you want to save time on watering, invest in a soaker hose! This is a hose that has many tiny holes that gently water your plants. It is a convenient and efficient way to take care of your vegetables, and it makes watering your garden that much easier.
Time to Fertilize
You can start fertilizing once your plants are 4 to 6 weeks old. How much fertilizer to use and how frequently it has to be done will depend on the types of vegetables you are growing.
Light feeders such as leafy greens and root veggies are best handled by following their seed packets and nursery stock suggestions. Follow the instructions on the frequency and strength of their feeding.
As to heavy feeders like beets, corn, tomatoes, and the brassicas, you will need a top dressing of well-rotted manure, organic matter, or compost and regular feeding with a water-soluble fertilizer.
Get Those Weeds Out!
The key to handling weeds is to stay on top of it. You only need to dedicate 20 minutes a day or every other day to keep the weeds in your vegetable garden in check.
Think of it this way, what’s 20 mins every other day compared to the amount of time that will be wasted if your vegetable garden becomes overrun with weeds?
Easiest Way to Weed
The key to quickly and easily getting those annoying weeds out is to pull them by hand, through a hand cultivator, or to hoe gently while the soil is moist.
For pathway weeds, you can use a weed torch or lay down some paving stones or bark mulch to keep these weeds at bay.
PRO TIP!
The best time to remove those weeds is when the soil is moist. If the soil is too dry, the green tops will more often than not just break off while leaving its roots in the soil to regrow.
Step #9: Reap What You Sowed!
So you have taken care of your vegetables, and they are finally ready to be harvested. For beginners, this may be one of the most exciting moments of their gardening dreams. Finally, all your effort has paid off!
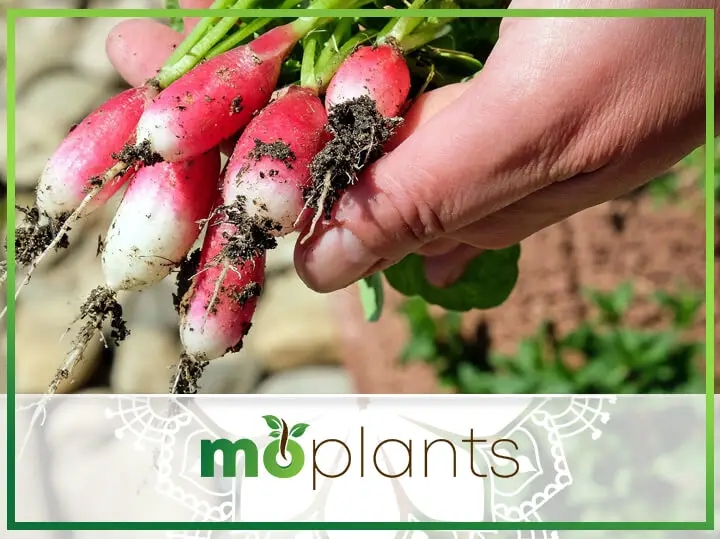
When you finally bite into that vegetable that YOU grew in your vegetable garden and on your very soil, you will forget all the sweat you had to put into it. Not only is it nutritious, healthy, and budget-friendly, but extremely rewarding, too!
Infographic
Conclusion
Vegetable gardening for beginners is not that hard. You need to make sure you get all the information you need about the vegetables you want to grow in your vegetable gardens.
As with anything, perfecting the skill of gardening requires time, effort, and patience.
But if you want something to do while you are stuck at home or even just on the weekends, there is nothing more fulfilling than watching your plants grow day by day.