It’s best to thin carrots during the first few weeks of their growing season.
Thinning carrots happens in two stages, which we’ll discuss in the next section below. Some gardeners even thin carrots a third time.
To answer your question as quickly as possible, let’s dive right in!
Thinning Carrots: The Best Time to Thin Carrot Plants
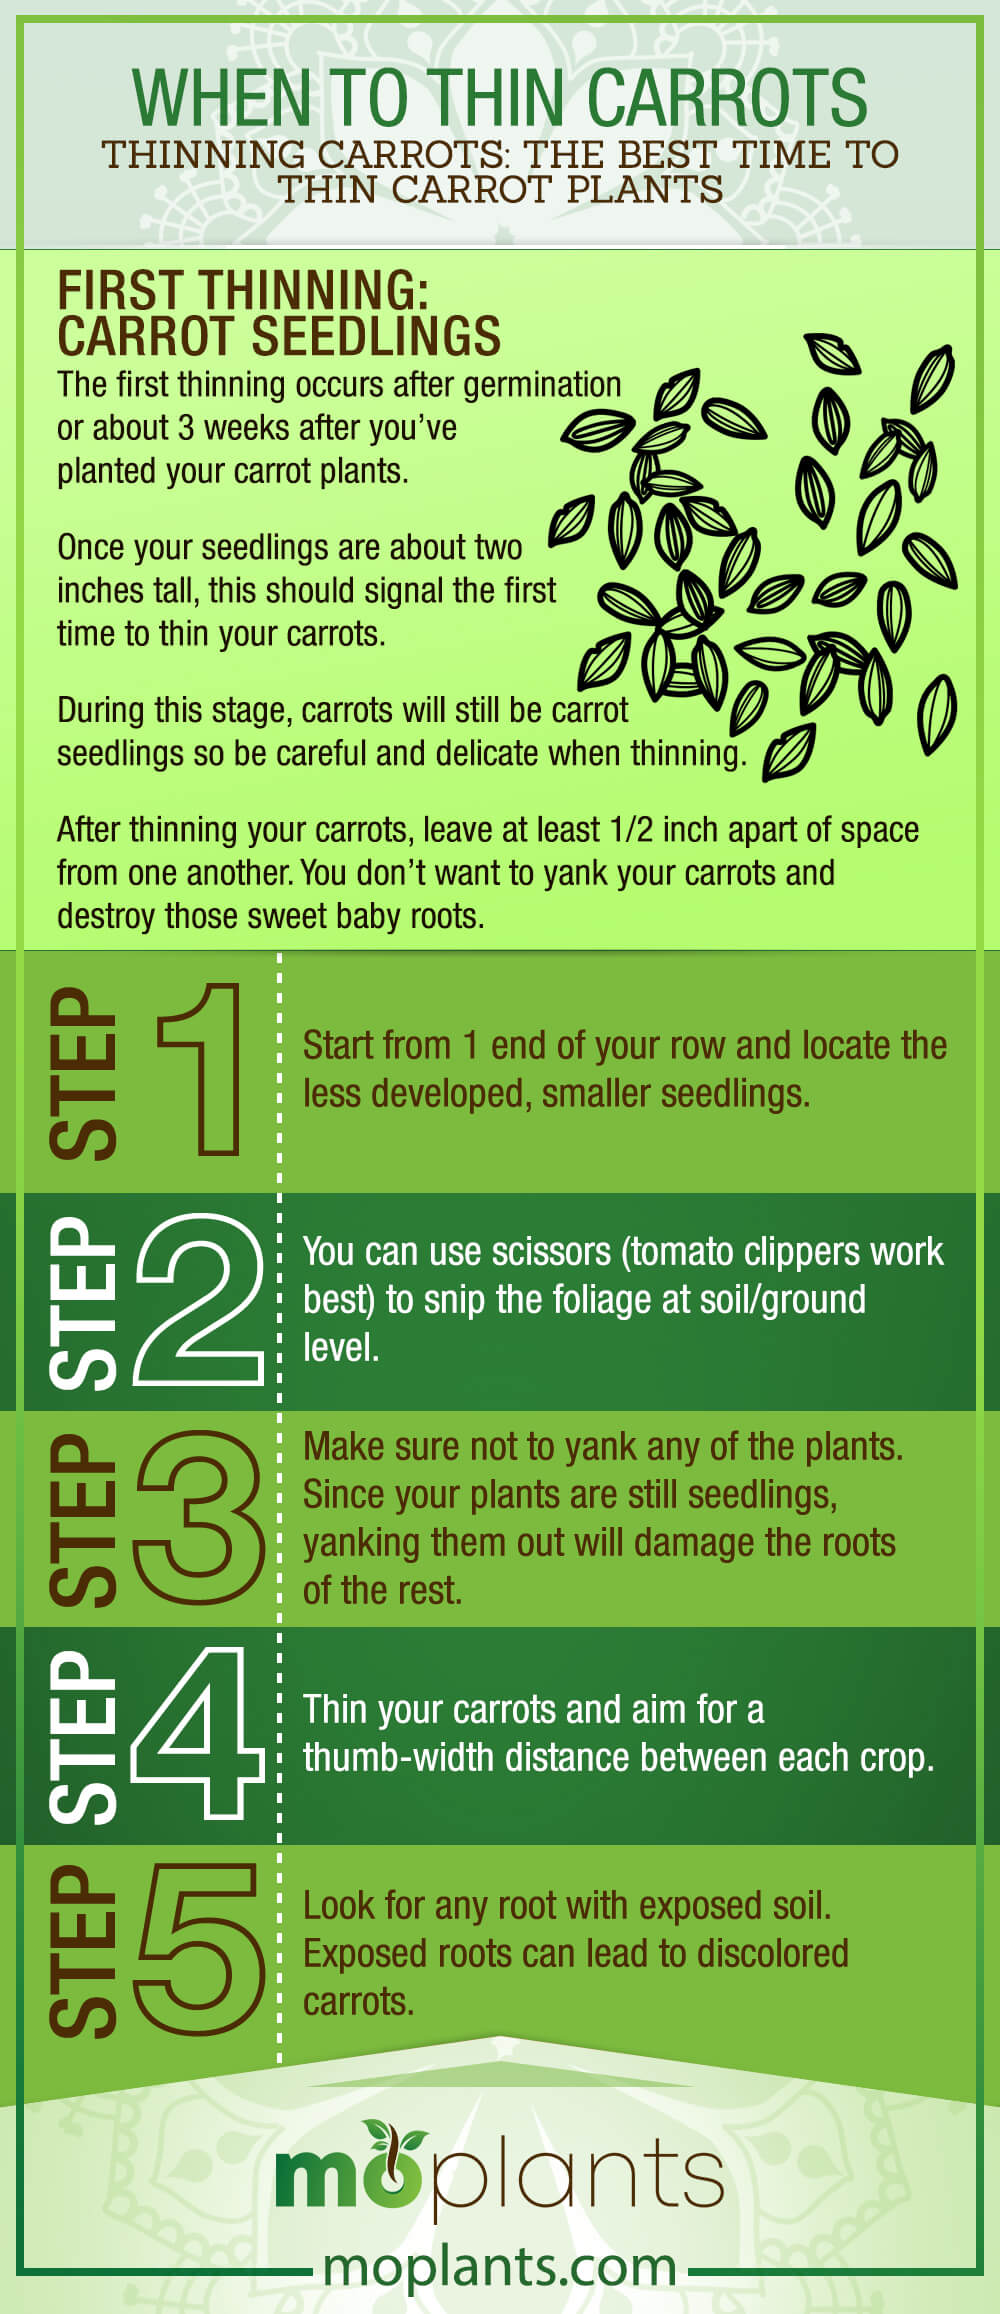
First Thinning: Carrot Seedlings
The first thinning occurs after germination [R] or about 3 weeks after you’ve planted your carrot plants.
Once your seedlings are about two inches tall, this should signal the first time to thin your carrots.
During this stage, carrots will still be carrot seedlings so be careful and delicate when thinning.
After thinning your carrots, leave at least 1/2 inch apart of space from one another. You don’t want to yank your carrots and destroy those sweet baby roots.
Since your carrots are in a delicate stage, you must treat the seedlings with care. The best approach is to thin your carrot seedlings at ground level using scissors or tomato clippers.
Depending on the varieties of your carrot seeds, this also influences the space you should leave between each plant.
For a smaller plant variety such as Baby Spike Carrots, aim for one seedling per inch. For a larger variety such as Danvers Half Long Carrots, aim for two to three inches per seedling.
Proper spacing is crucial to the growth of your carrots since carrot plants require adequate room to grow.
So what now?
After you’ve successfully thinned your seedlings, sit back, relax, and wait for a few more weeks until your carrots reach four inches high.
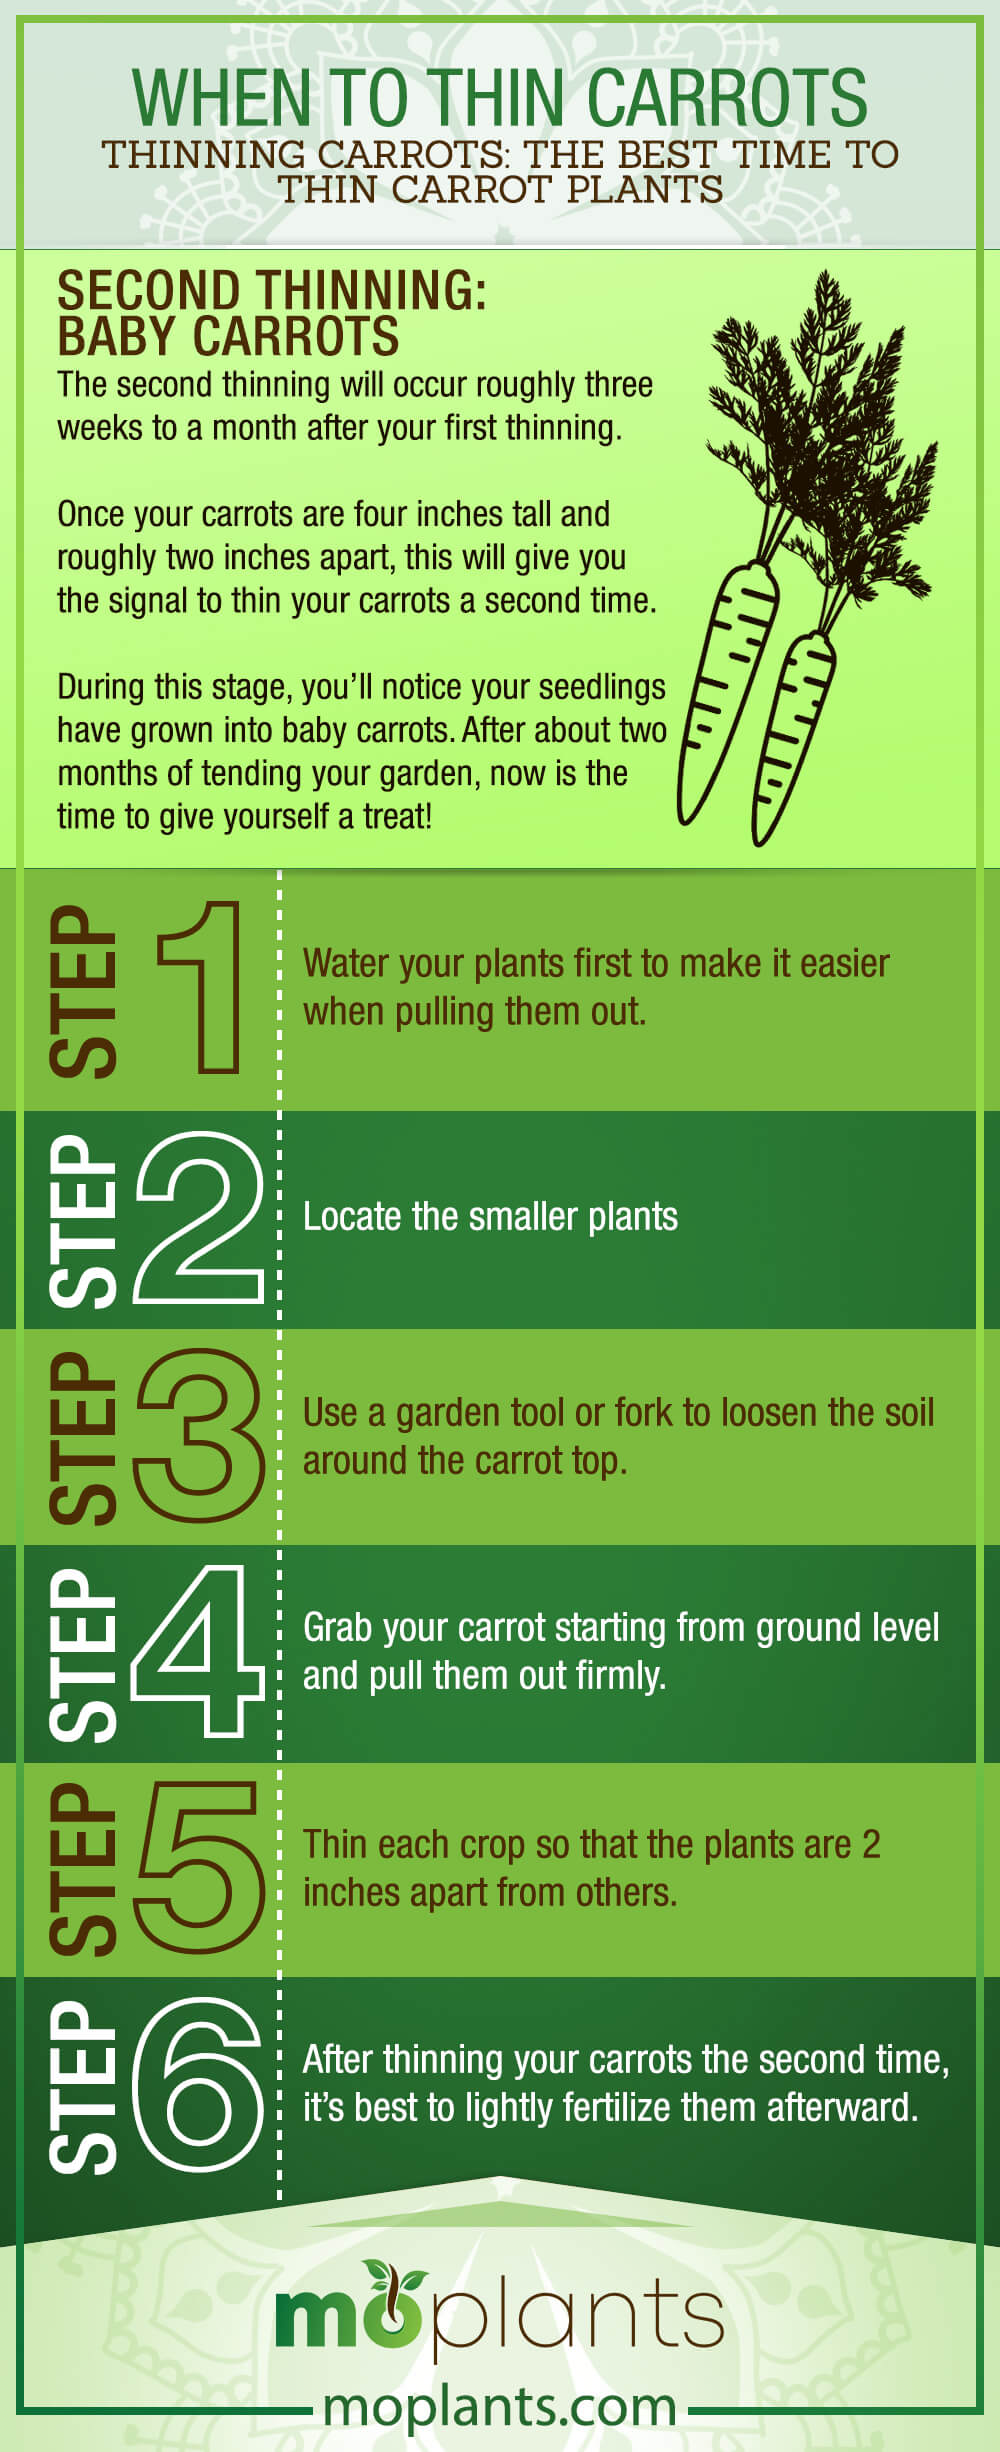
Second Thinning: Baby Carrots
The second thinning will occur roughly three weeks to a month after your first thinning.
Once your carrots are four inches tall and roughly two inches apart, this will give you the signal to thin your carrots a second time.
During this stage, you’ll notice your seedlings have grown into baby carrots. After about two months of tending your garden, now is the time to give yourself a treat!
You might be wondering with what exactly. Of course, it’s none other than the carrots in your garden!
You’ve survived the challenging early growth period, so why not treat yourself?
These make for a healthy, delicious snack you can eat on its own or pair with a recipe you’ve been meaning to try.
Want to go Netflix and chill with organic snacks? Some young carrots will do the trick.
Once you’ve thinned your plants, leave at least one to two inches of space apart. This will allow the roots to grow with little competition.
Should You Thin Carrots a Third Time?
Ahh, yes – the one question that most beginner gardeners ask.
We understand. You don’t want to touch your precious babies so why would you possibly interrupt those sweet roots clinging onto the ground.
That being the case, here’s what we suggest: try to thin a batch of carrots a third time while keeping the other batches as is.
This way, you’ll be able to compare whether thinning your carrots a third or second time will produce the best yield.
However, thinning your carrots a third time primarily serves as a way to minimize smaller-sized carrots and any mishappenings.
Why Carrot Thinning Is Important to Its Growth
Growing carrots requires high-quality soil around each plant. In addition, carrots don’t handle competition well.
Both these factors equate to a high standard for carrot plants to grow optimally. The bar is high, and by not meeting these standards, you get defected and mishappen carrots.
That’s not something you want for your garden, right?
Now let’s dive deeper into why thinning your plants are crucial. First, since carrots don’t handle competition well, this directly affects your soil.
Your garden soil can only hold so many nutrients and minerals until there won’t be any more left for your plants.
If you don’t thin your plants, there won’t be adequate room for each carrot to grow. Even with an opportunistic weed in place, this won’t be enough to compensate for any lacking nutrients.
Neglecting this leaves you with a low-quality harvest.
Furthermore, since carrot seeds are planted within 1/2 inch from each other, it’s more crucial to keep an eye on your plants.
If you don’t you might end up with forked or twisted roots or mishappen carrots. Now if you have plans to sell these in a farmer’s market, would you buy a defective carrot?
Or better yet, would it taste as good?
How to Thin Carrots
Now that you know the importance of thinning carrots, among other things, we’ll also share with you how to properly thin your plants.
Here’s what you need to do:
Note: Make sure to water your growing carrots regularly since this makes it easier once you pull them out of their roots.
First Thinning
Step 1: Start from 1 end of your row and locate the less developed, smaller seedlings.
Step 2: You can use scissors (tomato clippers work best) to snip the foliage at soil/ground level.
Step 3: Make sure not to yank any of the plants. Since your plants are still seedlings, yanking them out will damage the roots of the rest.
Step 4: Thin your carrots and aim for a thumb-width distance between each crop.
Step 5: Look for any root with exposed soil. Exposed roots can lead to discolored carrots.
Infographic
Second Thinning
Step 1: Water your plants first to make it easier when pulling them out.
Step 2: Locate the smaller plants
Step 3: Use a garden tool or fork to loosen the soil around the carrot top.
Step 4: Grab your carrot starting from ground level and pull them out firmly.
Step 5: Thin each crop so that the plants are 2 inches apart from others.
Step 6: After thinning your carrots the second time, it’s best to lightly fertilize them afterward.
Infographic
Should You Transplant Carrot Thinnings?
Some might argue transplanting carrot thinning isn’t a good idea since it’s not always a successful process.
However, if you’re willing to try and want to create a harvest that stands out from the rest, follow these steps:
Step 1: Find a good spot to transplant your thinnings. Leave at least 2 inches of room between other plants.
Step 2: Push a pen straight down into the soil as far as it goes.
Step 3: Grab your thinning from the stem and place it into the hole without bending it.
Step 4: Surround your transplanted carrot with some soil so that it stays upright and in place.
Step 5: Repeat the process until you’ve finished transplanting all thinnings.
Step 6: Water your transplanted carrot thinnings to ease the transition.
Final Words: Some Advice & Tips Before You Go
If you’re growing smaller varieties, [R] take note these are shallow-rooted and thus, more prone to damage.
Thin carrots in moist soils to cause the least amount of damage possible. Work and tend your garden with utmost care whether you’re growing smaller or larger carrots.
To optimize thinning your carrots, cutting will prevent the least amount of damage than pulling or yanking.
Remember: it’s crucial to give your plants and each root proper breathing room if you want them to grow to their optimal size.
Before growing season starts, be sure to plan ahead too! Happy Gardening!
